


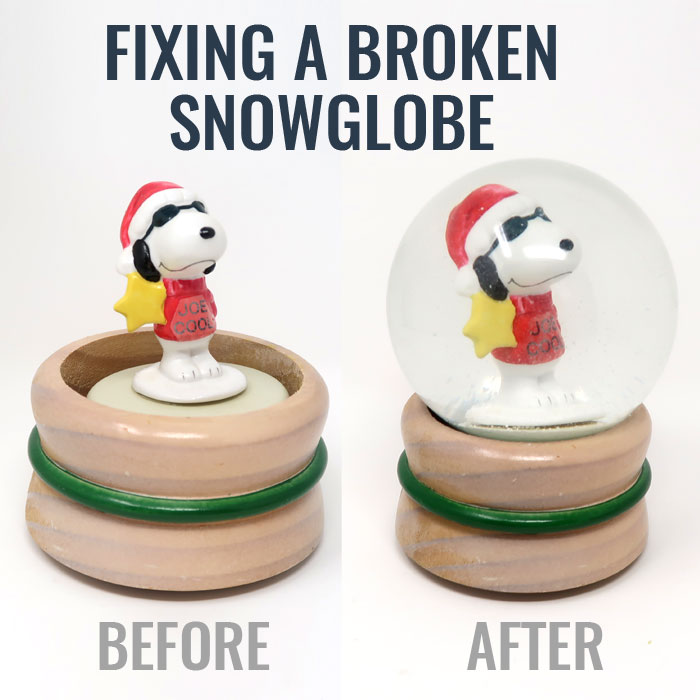
Tragedy struck! Dad was only trying to help clean the house. He was moving a Snoopy snow globe, when it tumbled to the floor, shattering the fragile glass globe. To be fair, the glue holding the globe in place had failed over ten years ago. It was a disaster waiting to happen. With a little help from the internet, I was able to put this treasured collectible back together. The saga continues in this how-to for fixing a broken snow globe. Watch the video and get more details in the walk-through below.
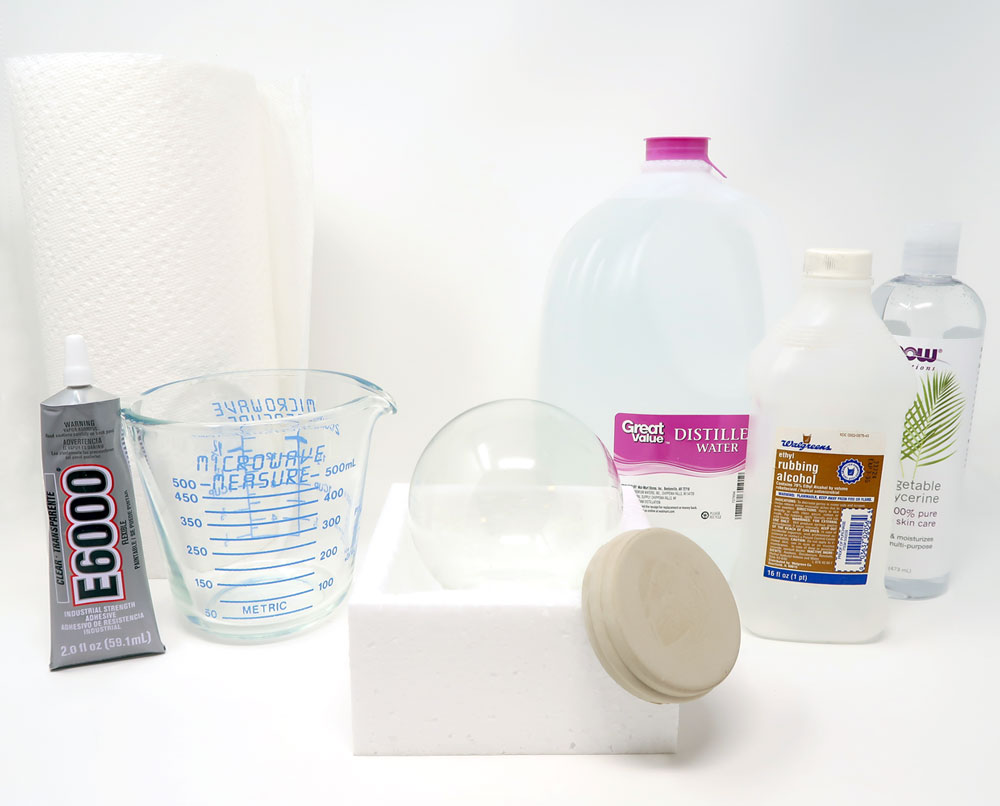
SUPPLIES
First things first, the missing snow globe glass needed replacement. Luckily, Amazon* had what I needed to get started. The replacement globe kits come with the snow and rubber gasket needed. The kit also comes with directions. I measured three times and got the wrong globe, so go just slightly smaller than your base-size. I used the 4″ globe for this project. Additional supplies include distilled water, glycerin, isopropyl alcohol, E6000 Adhesive and patience.
Setup Your Supplies
Once getting the kit, you need to soak your snow. This helps them to sink properly once in the water. It took a couple weeks for mine to sink down to the bottom of the glass I was using. Re-wetting them helped.
After your snow is ready, it’s time to re-build your snow globe. Find a nice quiet spot you can lay things out for a couple of days. Gather some towels and paper towels cause you’re going to need them. Plus, get all your supplies handy for the build. Read the included directions again. Next, get started.
Inserting the Figurine
First, glue the figurine to the gasket with the E6000. I skipped this step since my old gasket wasn’t brittle and it was the exact same size as the new one. Wait 24 hours for the glue to dry.
It’s time to fill your snow globe! I used the towels to create a little nest for the glass globe. The last thing you need is to buy another new one. Place it with the hole at the top. Add your snow, without the water, to the globe. Try and get it mostly to the bottom and not in the working rim area. Next, work the rubber gasket into the globe slowly. You’ll probably have to bend it a bit to squeeze it in there (that’s why we used flexible glue). It will be difficult. It will be tricky. Take your time. Work slowly, don’t push too hard. Eventually, it will go in. I used a little bit of the glycerin to try and help. It was a bit TOO slippery and the figurine kept clinking against the inside of the glass.
Adding the Water Mixture
You finally have the gasket in! Now it’s time to mix up a concoction of distilled water, glycerin and isopropyl alcohol. Using distilled water makes sure there aren’t any minerals or chlorine ruining your figurine. The glycerin helps the floating snow float, rather than just sink, in your creation. The isopropyl alcohol stops ick forming inside the globe. I mixed the three into a measuring cup without measuring: mostly water with a quick shot of glycerin and alcohol.
Now, we’re at the messy part. Carefully squeeze back the gasket to allow the water mixture to be added to the globe. Fill the globe until there’s no air left. Then slip the gasket back into place. The bottom of the gasket should be flush with the bottom of the globe. Once you have it all in place, you can carefully test it. Water shouldn’t be leaking out from around the gasket. Once you’re assured your snow globe is just right, set it back in its towel nest with the gasket up. Dry the gasket area well. Then wait a few hours or so until it’s completely dry.
Finishing Touch
Once the gasket is dry, it’s time to finish this project! Grab your trusty E6000 glue and seal that gasket edge up. Once it’s set enough to not fall off, you can carefully put the globe back into its base. I had to remove some old, dried glue from the base first, so I knew I wasn’t going to have another tumble while dusting. I used the E6000 to adhere the globe to the base. Just be careful not to get the glue everywhere, especially if there’s an exposed musical mechanism inside. Clean up any excess glue before it sets. Finally, wait 24 hours for the glue to set before testing your snow globe. Congratulations! You saved your parents’ marriage!**
Final Thoughts
The snow globe replacement kit was pretty easy to use. If you want to save a few bucks, you could try a local thrift store to find just the right size donor globe. However, the kit might be easier and quicker in the long run. Another note is that sources on the internet said to use liquid dish soap instead of glycerin. Because of the dyes used in most soaps, I decided my collectible warranted the more expensive solution. Finding glycerin locally was tricky, so I just bought mine on Amazon*.
Fixing a broken snow globe cost around $25. I already had the E6000 glue and isopropyl alcohol. While it isn’t cheap, it can be more cost effective than buying a different snow globe. If you have globes that have condition issues, it shouldn’t be too difficult to use these same materials and give them new life. There are also full kits with the base if you want to try making a custom snow globe creation.
*Affiliate link. By making a purchase through these links, I may earn a small commission. Those funds help make articles like this one and many more. Learn more about supporting our site…
**Just kidding! Mom wasn’t that upset.
Give Back!
If you found this tutorial helpful, please considering giving back.
Thank you for your support!